Keep your Servers update management under control. This how-to is specifically created for Azure VMs and Azure Arc Enabled VMs/Servers
First we’re going to assign a policy for periodic checking for missing system updates
Go to Policy -> Authoring -> Definitions and search for Configure periodic checking for missing system updates on azure Arc-enabled servers

Click on Assign policy

Then you need to configure a few things in Basics
Scope: click on the three dots and choose the subscription and Resource Group
And leave the rest as it is click on Review + create and Create
Go to Azure Update Manager and go to Resources -> Machines

What you’ll see is under Periodic assessment that the value is Yes.
Periodic assessment will check every 24h for missing updates.
Go back to Azure Update Manager and go on the overview you’ll see Schedule updates

Click on Schedule updates
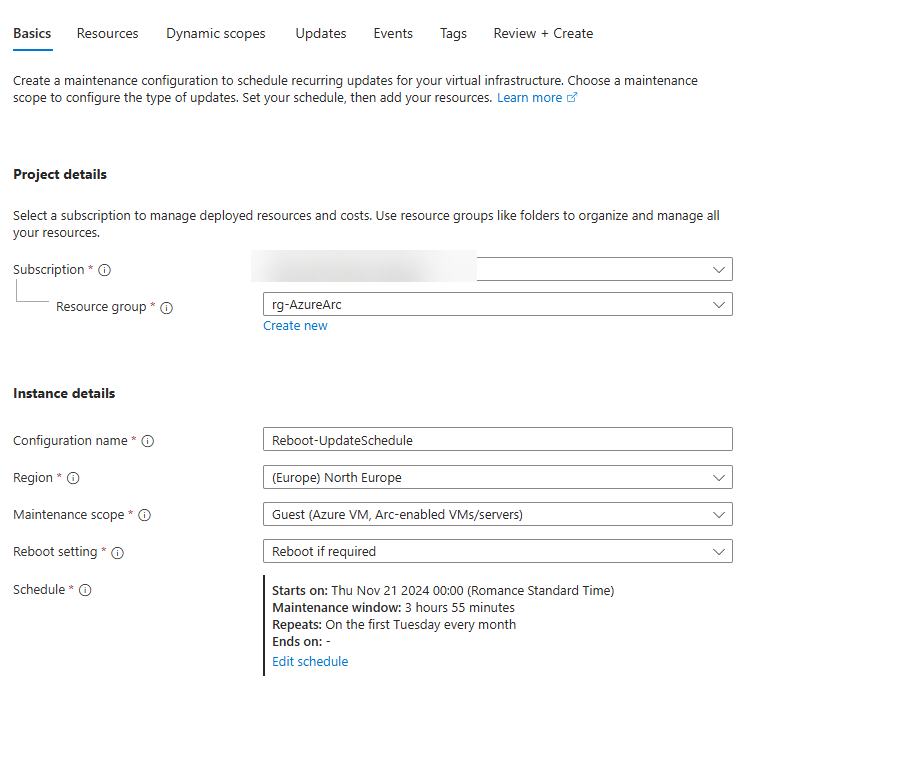
So on the Basics tabs
Subscription: your subscription you’re working on
Resource Group: your RG you’re working on
Configuration name: Reboot-UpdateSchedule
Region: same region as I chose for the resource group
Maintenance scope: Guest (Azure VM, Arc-enabledVMs/Servers)
Reboot setting: Always reboot (hence the configuration name)
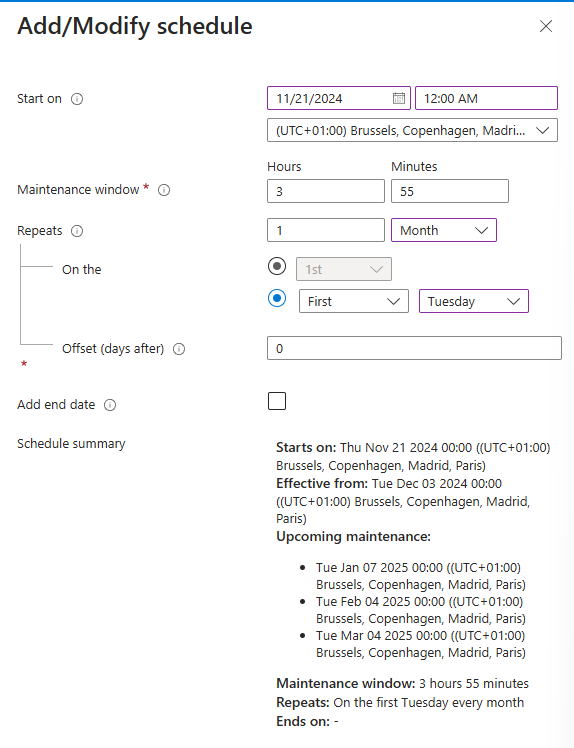
Schedule: specify it for your needs, I’ll always update a week before the patch Tuesday of the month.
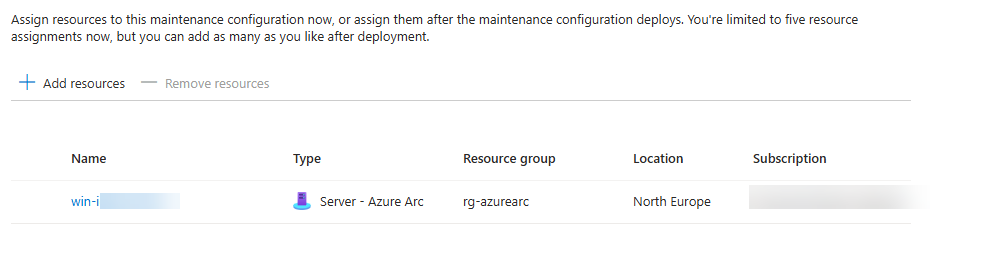
Click on next and click on add resources
Option 1
Choose your resources you want to add to the schedule (you can create schedules for different type of servers ex: domain controllers, SQL servers, DHCP, DNS…)
Option 2
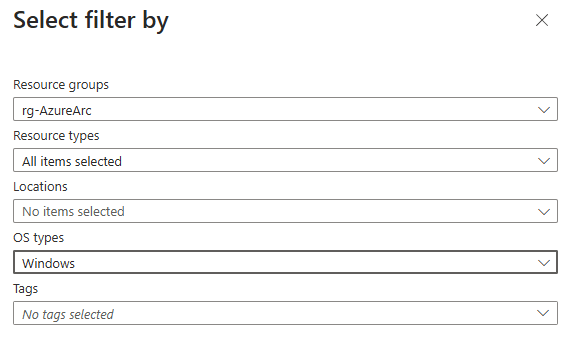
You can add a dynamic scope based on Subscriptions and you can Filter it by RGs, resource types, locations, OS types and Tags
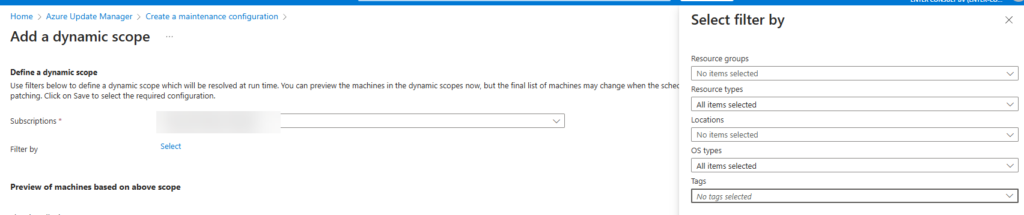
In this case we’re adding it through a dynamic scope (it will enroll automatically newly added and existing VMs/servers):
Click on Next
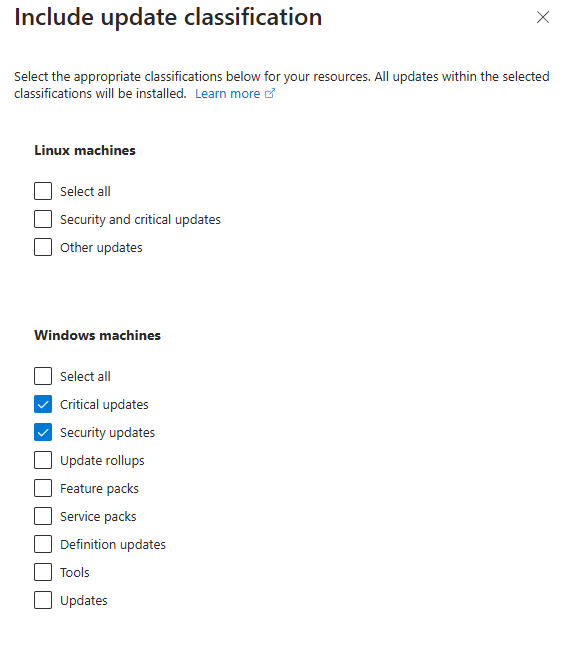
You can choose which OS and what kind of updates:
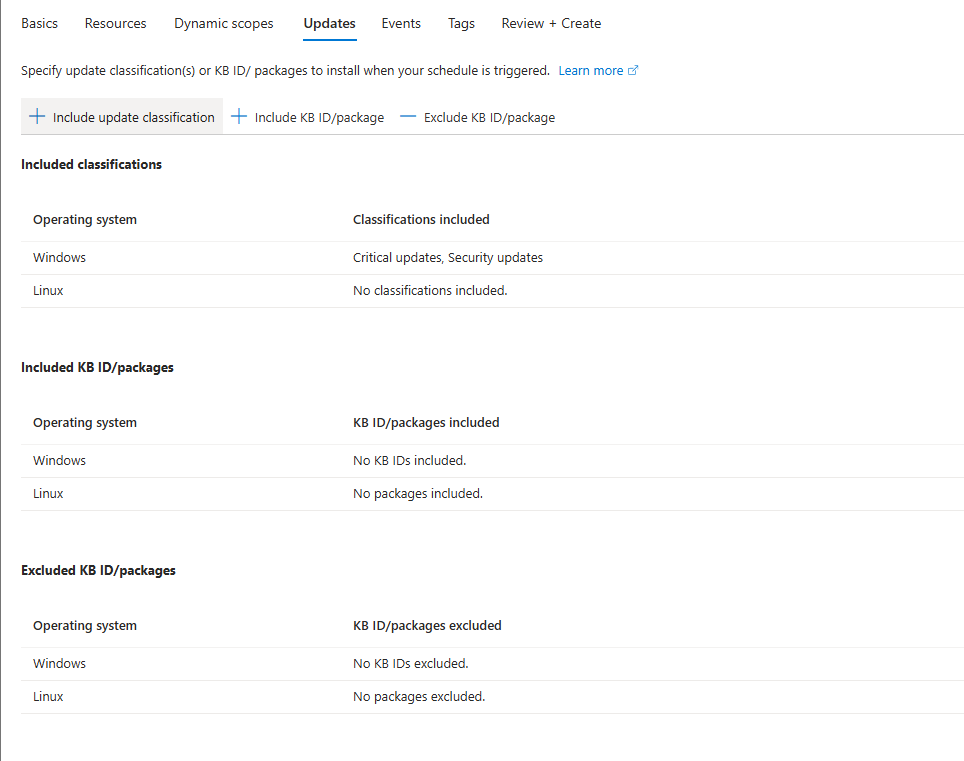
Click on Include update classification
In this case we’re only installing Critical and Security updates
Click on Next
We’re not going to add an Event subscription
Click on Next
Choose your tags and click on Review + create
Azure will validate first and will show you the which tab the misconfiguration holds.
If the validation is passed you’ll see this:
Click on create
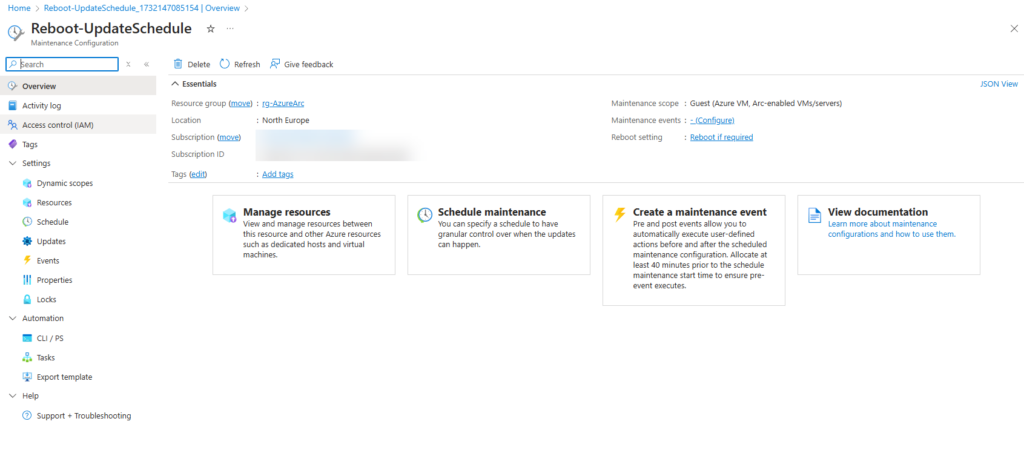
After creation click on Go to resource
An maintenance configuration is created
Check on the azure arc enabled VM
Go to Azure Arc -> Azure Arc resources -> Machines
Click on the right machine
Go to Operations -> Updates
You’ll see Scheduling click on it.
And you’ll see the schedule attached to your VM

That was it.
Update management can be painful but when your RG’s, tags are designed the right way it is really easy to created Schedules and keep your machines up-to-date.
Best practices for tagging:
Pingback: Azure arc machines Windows & Linux – extend of chapter 3